Jotform to DrChrono Patient Intake Sync
When a patient submits a Jotform, this workflow checks if they already exist in DrChrono. It updates existing profiles or creates new patient records - automatically and error-free
Click to expand
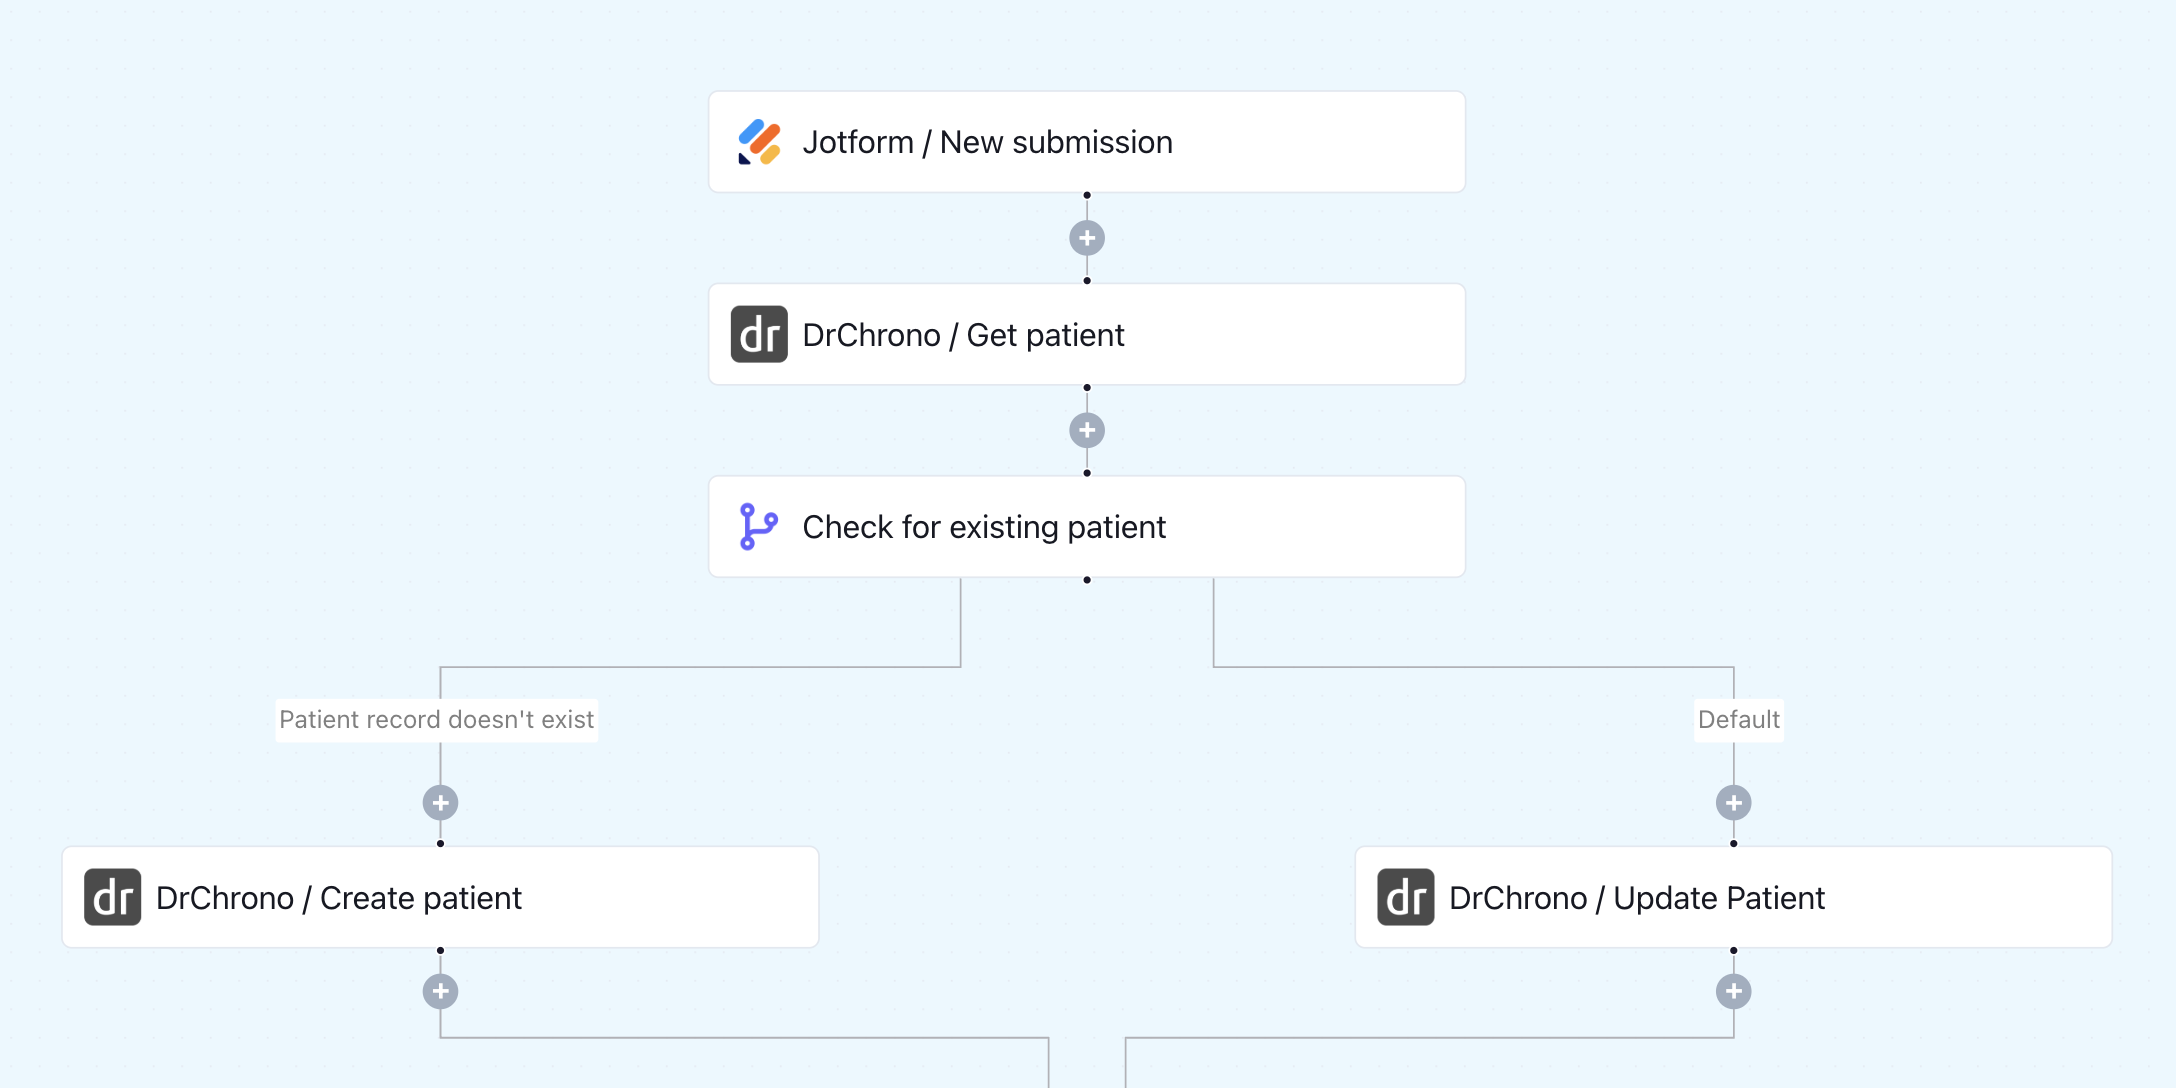
How the automation runs
- A patient submits your Jotform intake form
- Keragon searches DrChrono for an existing patient using identifying fields from the form
- If a matching record is found, the patient's DrChrono profile is updated with the latest data
- If no match is found, a new patient record is created in DrChrono
- The entire process runs automatically — no staff action required
Is this for you ?
- You use Jotform for intake and DrChrono as your primary EHR
- Your staff is manually entering form submissions into DrChrono patient profiles
- Duplicate patient records are an ongoing problem for your practice
- You're a high-volume clinic that needs a scalable, no-code intake workflow


More templates by
Keragon
More
Patient Intake
templates
Related templates


FAQ
No items found.